
Before You Begin — Pre-Treatment Evaluation
Vacuum Bell Therapy · Daily Protocol
The Complete VBT Protocol. Phase by phase.
A clinically validated 4-phase programme — from your first 30-minute session to consistent daily wear — built on 20 years of peer-reviewed evidence. No guesswork. Measurable progress.
52%
Full correction rate
Amsterdam Study 2025, n=259
12–24
Months — average treatment duration
Haecker et al., EJCTS 2014
30min
Minimum starting session
Boston Children's Hospital protocol
Treatment Roadmap
4 Phases. One continuous journey.
Vacuum Bell Therapy is not a single action — it’s a progressive protocol. Each phase builds on the previous one, gradually increasing wear time, pressure, and sternal retention. The four phases below reflect clinical consensus from Haecker, Boston Children’s, and the 2025 Amsterdam study.
01
Weeks 1–4
Conditioning
Skin and chest wall adaptation. Short sessions build tolerance without irritation.
2 × 30 min daily
02
Months 2–3
Progression
Wear time increases incrementally. The sternum begins to hold elevation between sessions.
Up to 4 hrs daily
03
Months 4–12
Consolidation
Extended and overnight use. Permanent chest wall remodelling begins. Monthly measurement confirms progress.
4–8 hrs daily
04
Month 12+
Maintenance
Maximise correction and prevent relapse. Rest days introduced. Duration varies by age and severity.
6–8+ hrs / overnight
Vacuum Bell Therapy requires a standardised evaluation prior to daily use. This includes a clinical examination, cardiac ECG and echocardiography to exclude anomalies, and exclusion of contraindications (skeletal disorders including osteogenesis imperfecta, coagulopathies such as haemophilia, vasculopathies including Marfan syndrome and aortic aneurysm, and active cardiac conditions). Your first session should be supervised by a medical professional. Always consult your physician before beginning the protocol.
Phase-by-Phase Breakdown
Exactly what to do, week by week.
Each phase includes target wear time, pressure guidance, expected milestones, and clinical context. Follow these as minimum thresholds — individual variation is significant.
1
Weeks 1–4 · Skin & chest wall adaptation
Phase 1 — Conditioning
Sessions per day
2 sessions
Duration per session
30 min → 60 min
Target pressure
120–150 mbar
Weekly increment
+ 15 min / week
The first sessions must be performed lying flat. Apply 3–5 pump strokes and hold for 30 minutes. Do not increase pressure beyond mild suction that produces visible but painless sternal elevation. Mild redness around the cup rim is normal and should fade within 2 hours. Log each session date, pump count, and any skin reaction.
Clinical note: Boston Children’s Hospital protocol recommends starting with 30 minutes twice daily and adding 15 minutes per week until reaching 2 hours twice daily. (Bartkus, Boston Children’s Answers, 2023)
2
Months 2–3 · Increasing sternal retention
Phase 2 — Progression
Total daily wear
2–4 hours
Split sessions
Morning + evening
Pressure
150–200 mbar
Key milestone
Elevation holds 2–4 hrs
By week 8, the sternum of most patients will remain elevated for several hours after each session before returning to its baseline position. Increase total wear time in 30-minute increments every 5–7 days. If skin reactions appear, reduce pressure — do not push through irritation. Introduce wear during light daily activities: sitting at a desk, watching television, or during homework.
Key indicator: After approximately 8 weeks of daily use, the sternum should stay elevated on its own following each session. This confirms chest wall softening is underway.
3
Months 4–12 · Structural remodelling
Phase 3 — Consolidation
Total daily wear
4–8 hours
Overnight use
Introduced gradually
Pressure
150–250 mbar
Progress check
Monthly depth measurement
This is the phase where structural, permanent correction occurs. The 2025 Amsterdam study (n=259) identified that longer daily wear time and overnight use were the strongest predictors of complete correction. Start overnight use with minimal pressure — sleep on your back. Increase pressure after 2–3 weeks of comfortable overnight sleep. Measure chest depth every 30 days using the standardised supine rod method.
Research finding: The 2025 study reported that patients who used the device overnight achieved significantly higher correction rates. Overnight use alone can add 5–8 hours to daily wear time. (Pectus Solutions Clinical Review, 2025)
4
Month 12+ · Preventing relapse
Phase 4 — Maintenance
Total daily wear
6–8+ hrs or overnight
Rest days
1 day / week
Pressure
As established
End of treatment
When depth stabilises
Treatment ends when the chest wall depth has stabilised at a corrected level — confirmed across three consecutive monthly measurements with no regression. Haecker et al. demonstrate in their 13-year study that patients who complete treatment with consistent maintenance protocols have lower relapse rates. Introduce one rest day per week to allow skin recovery and maintain therapy effectiveness over the long term.
Clinical insight: Much like orthodontic braces, discontinuing VBT abruptly without full correction risks partial relapse. Tapering over 2–3 months at the end of treatment is advisable. Discuss the end-of-treatment protocol with your treating physician.
Daily Application Guide
Your step-by-step daily session.
Follow this sequence every session. Consistency in application reduces skin reactions, ensures accurate pressure, and produces more reliable sternal elevation.
01
Ensure dry, clean skin
Your chest must be completely dry before application. Do not apply immediately after showering, swimming, or physical activity. Moisture prevents the seal from forming correctly and can cause blistering.
02
Select the correct position
For the first 4–6 weeks, always begin lying flat on your back. This maximises sternal elevation and minimises pressure on the device seal. Advanced users may apply while sitting or standing.
03
Position the device precisely
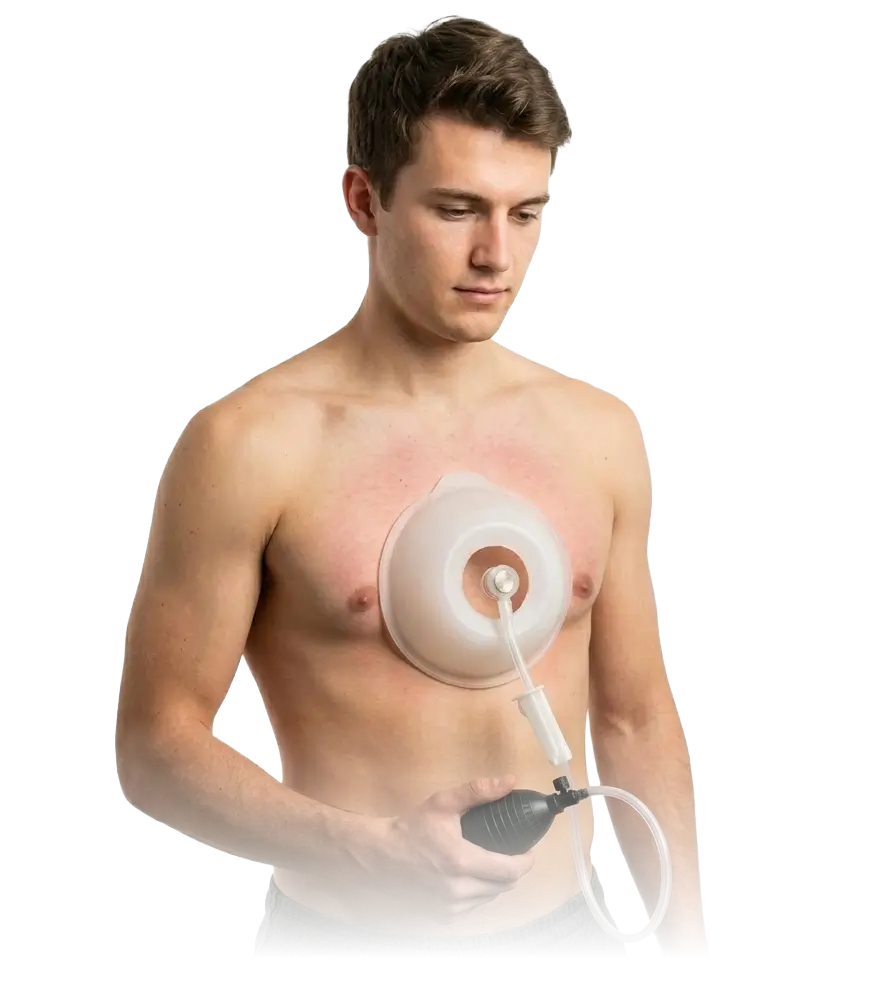
Centre the cup directly over the deepest point of the pectus deformity. Press firmly but gently to create an initial seal. The rim should make full contact with the skin — no gaps.
04
Apply pressure gradually
Begin with 3–5 pump strokes. Watch the sternum rise toward the transparent window. Monitor pressure on the gauge if equipped — target 120–150 mbar in Phase 1, up to 250 mbar in later phases. Never pump to the point of pain.
05
Maintain and monitor during wear
If the device loses suction, apply 1–2 additional pumps. High-quality devices should maintain pressure for the full session. Note the duration, any discomfort, and the pressure level in your log. Rise slowly if moving to standing to avoid dizziness.
06
Release and assess
Release the valve slowly. Examine the skin: mild redness is normal and fades within 2 hours. Apply moisturising oil or cream (almond, coconut, or CeraVe) immediately after removal. Record the session in your log. Photograph monthly from the same angle.
“Patients are instructed to begin using the device two to three times per day for 30–60 minutes, gradually increasing duration and applied suction as tolerated. We recommend wearing the Vacuum Bell device overnight and during routine activities — eating, homework, or gaming — to accumulate necessary wear time.”
Session Log — What to Record
Date & Time
Morning, afternoon, or evening. Consistency in timing helps build habit and tracks cumulative hours.
Pressure Level
Note pump count or mbar reading. Increase pressure gradually — log your personal tolerance ceiling.
Skin Status
Mark any redness, blistering, or bruising. If present, note how long it persisted after removal.
Skin Care Protocol
After Each Session
Apply a lightweight body oil or moisturiser immediately. Almond oil, coconut oil, or CeraVe Moisturising Cream are all clinically cited options.
If Blistering Occurs
Stop for 1–2 days. Reduce pressure by 20% when resuming. Apply zinc oxide cream (e.g. Penaten) overnight to accelerate skin healing.
Rest Days
From Phase 3 onward, introduce one rest day per week. This allows skin recovery and maintains long-term therapy effectiveness.
Age-Specific Guidance
The protocol adapts to your age.
Chest wall flexibility decreases with skeletal maturity. Children achieve faster initial elevation; adults show slower but more sustained correction. All ages can benefit — but expectations and timelines differ.
Children
Ages 5–10
- Typical duration
- Chest flexibility
- Initial elevation retention
- Supervision required
- Target wear time
- Key note
Adolescents
Ages 11–18
- Typical duration
- Chest flexibility
- Optimal start age
- Overnight use
- Target wear time
- School wear
Adults
Ages 19+
- Typical duration
- Chest flexibility
- Post-removal retention
- Overnight use
- Target wear time
- Key note
Clinical Evidence — Age & Correction Outcomes
The Haecker et al. 13-year study (n=635, EJCTS 2014) found that patients under 11 years showed the most rapid sternal elevation, though breastbone retention post-removal was shorter in younger patients due to higher chest wall elasticity. Adult patients demonstrated slower but more sustained elevation. A 2024 retrospective study (PMC, n=72) reported that 25% of patients achieved excellent correction using the Haller Index as outcome measure, with a mean follow-up of 3.3 years. The correlation between treatment age and outcome remains a topic of ongoing research — the evidence consistently suggests that chest wall flexibility, not age alone, is the strongest predictor. Explore our full clinical evidence library →
Lifestyle & Activity
What you can — and cannot — do while wearing the device.
The Vacuum Bell is designed for integration into daily life. Most normal activities are fully compatible. A small set of situations require temporary removal.
✓ Permitted Activities
- Lying down, sitting, standing, walking
- Working at a desk or computer
- Watching television, reading, gaming
- School and academic activities
- Light jogging and walking outdoors
- Non-contact sports (cycling, yoga, pilates)
- Wearing under loose, thicker clothing
- Sleeping on your back (Phase 3+)
- Eating, light cooking, daily household tasks
✗ Remove the Device For
- Swimming and all water-based activities
- Contact sports (football, rugby, martial arts)
- Gym class and high-impact cardio sessions
- Any activity causing excessive sweating
- Showering and bathing
- Activities that require sudden, forceful chest movement
- Sleeping on your stomach or side (Phase 1 & 2)
After swimming: Ensure skin is completely dry before reapplying. Moisture prevents the cup seal from forming and dramatically increases the risk of skin blistering. Wait at least 20 minutes after drying.
Measuring Your Progress
Track, measure, confirm.
Progress with VBT is gradual and sometimes hard to perceive day-to-day. A structured measurement protocol ensures you capture real change and stay motivated throughout treatment.
Monthly Measurement Protocol
01
Remove device for 14 hours first
The sternum will remain temporarily elevated after each session. Always wait a minimum of 14 hours after last wear to measure baseline depth accurately — this is the standardised method used in clinical studies.
02
Lie flat in supine position
Lie on your back on a firm surface. Use a calibrated scaled rod or a ruler held horizontally across the highest points of your chest to measure the depth of the depression in centimetres.
03
Photograph — three angles
Photograph from directly in front, 45° left, and 90° left. Use the same distance, lighting, and body position every month. Store photos in cloud storage — visual comparison is your most powerful progress tracker.
04
Record in your therapy log
Log date, depth reading, any skin observations, and average daily wear hours for that month. A reduction of 1–2mm per month is typical and confirms that the protocol is working.
| Timepoint | Expected Milestone | Indicator |
|---|---|---|
| Week 1–2 | First visible sternal elevation during session | Sternum rises toward window |
| Week 4–8 | Sternum retains elevation post-removal | Elevation holds for hours |
| Month 3–4 | Measurable depth reduction | 2–4mm average improvement |
| Month 6 | Sustained sternum elevation between sessions | Visible chest improvement |
| Month 12 | Significant structural correction | HI improvement confirmed on imaging |
| Month 18–24 | Full or near-full correction (eligible patients) | 52.1% achieve complete correction (2025 study) |
Patience is part of the protocol. Haecker et al. document that 105 patients showed permanent lift of more than 1 cm after just 3 months of daily application (EJCTS 2006). Progress compounds — the chest is reshaping at a structural level that precedes visible results.
Frequently Asked Questions
Protocol questions, answered.
Common clinical and practical questions about the daily VBT protocol. For medical decisions specific to your case, always consult a qualified physician.
How long should I wear the vacuum bell each day?
Start with 2 × 30-minute sessions daily during Phase 1 (Weeks 1–4). Progressively increase to a target of 4–8 hours per day by months 3–4. Boston Children’s Hospital recommends adding 15 minutes per week until you reach 2 hours twice daily. The 2025 Amsterdam study found that longer daily wear time was one of the strongest predictors of complete correction. As a general principle, more wear time — as long as skin tolerates it — leads to better outcomes.
What pressure should I use with the vacuum bell?
Clinical protocols recommend starting at approximately 120–150 mbar of negative pressure (roughly 15% below atmospheric pressure). This is equivalent to approximately 5–6 inHg. A pressure gauge is strongly recommended for consistent, safe application — it removes the guesswork. In later phases (3–4), pressure can be increased up to 200–250 mbar as tolerance builds. Never pump to the point of pain. If you experience sharp discomfort, numbness, or tingling in your arms, release the device and rest before trying at a lower pressure.
Can I wear the vacuum bell at night while sleeping?
Yes — overnight use is recommended and often the most effective strategy for accumulating wear time, particularly from Phase 3 onward. A 2025 study with 259 patients identified overnight use as a key factor associated with complete correction. Start with minimal pressure and sleep on your back. It typically takes 2–4 weeks to become comfortable sleeping with the device. Increase pressure gradually once overnight wear is established. Some adolescent patients eventually wear the device for 7–8 hours overnight as their primary session.
Can I exercise or play sports while wearing the vacuum bell?
The device can be worn during most daily activities including sitting, walking, light jogging, cycling, yoga, and non-contact sports. Swimming, water activities, contact sports, and high-impact gym activities require removal. After swimming, ensure the chest is completely dry before reapplying — moisture prevents proper seal formation and increases blistering risk. Boston Children’s Hospital recommends removing the device during gym class and contact sports as a precaution.
How soon will I see results from vacuum bell therapy?
Immediate temporary sternal elevation is visible during your first session as the device lifts the breastbone. By weeks 4–8, most patients notice the sternum retains elevation for several hours after removal. Measurable depth reduction — typically 1–2mm per month — is usually confirmed by month 3–4. The 2025 Amsterdam study (n=259) reported a 52.1% complete correction rate after consistent therapy over 12–24 months. Results vary significantly with age, deformity severity, chest wall flexibility, and consistency of wear.
What do I do if my skin becomes red or blistered?
Mild redness after each session is entirely normal and fades within 2 hours. This is caused by increased blood flow to the area. Apply a moisturising oil or cream (almond oil, coconut oil, or CeraVe) after every session to maintain skin integrity. If blisters appear, stop therapy for 1–2 days, apply zinc oxide cream overnight, and resume at 20% lower pressure. Persistent blistering despite pressure reduction should be discussed with a clinician. Skin issues are temporary and manageable — never allow mild skin reactions to justify abandoning treatment.
Will pectus excavatum come back after I stop vacuum bell therapy?
Relapse risk is real if therapy is stopped prematurely or abruptly. Haecker et al. document that patients who complete a full protocol with adequate maintenance show significantly lower relapse rates. The mechanism is analogous to orthodontic braces — the correction is structural but requires sustained pressure until the chest wall fully stabilises. Tapering wear time over 2–3 months at the end of treatment, rather than stopping abruptly, is the clinical recommendation. Three consecutive monthly measurements confirming stable depth are the standard end-of-treatment indicator.